Behind the Scenes with Brightkidz – How Are Reflectors Made?
Are you ready for a science lesson? This week we invite you to take a look behind the scenes and see how reflectors are made. We’ll show you what’s inside a reflector and how the special materials and processes help to make them so bright. Finally, we’ve some fun ‘reflector’ tasks you can try in your classroom.
Types of Reflector
There are two main types of reflector; microprismatic (made of a special shiny plastic) and glass bead (a silver-grey material).
Some of our reflectors, such as our monsters and most of our hi vis waistcoats, are made with glass bead reflective material.
But today we’re looking at how the more colourful type are made – flexible microprismatic reflectors.
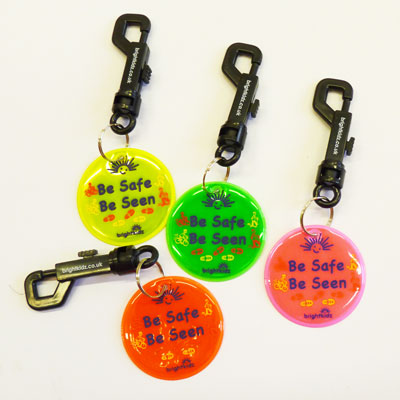
Reflectors in Different Shapes and Sizes
These come in many different shapes, sizes and designs – for example zip clips, badges, clip-ons, snapbands, lace reflector or stick-ons. But they are made from the same kind of material – microprismatic plastic sheeting.
What’s ‘Microprismatic’?
This clever material has a smooth top surface and very, very small triangular bumps on the underside (it feels scratchy). Once the material has been made into reflectors these act as prisms and bounce light back to where it came from (they are ‘retro-reflective’). If you cut a reflector open you will be able to feel this. Click here to expand our ‘microprismatic’ diagram.
Which Colours are Best?
This special sheeting is available in many colours; pink, blue, clear, white and they all will help you to be seen at night. You can choose whichever colour you like.
But our favourite colours which we choose for our stock reflectors are the ones that are also fluorescent (really bright, neon colours – yellow, orange, green and pink). This is because fluorescent colours show up in daytime and the reflectivity works at night. And we want you to be seen day, dusk and night. Check out our ‘fluorescent for day, reflective for night’ info.
Getting the Right Shape Reflector
Reflectors can come in all sorts of shapes… circles, stars, triangles or any random shape you choose. Each shape needs a special metal cutter called a ‘die’ to be made.
As these dies are really expensive to get made, we use the same ones over and over again for our stock reflectors. For custom reflectors, most people choose reflectors in shapes that already have a die… like a circle or star.
Printing
If the reflectors have a design on them, such as a logo or message, the sheets need to be printed first. As well as the design, there are also special guide marks printed to make sure the print ends up in the right place… and the right way round!
In the photo are microprismatic sheets which will be made into lace reflectors – the ‘two footsteps’ design appears on each lace reflector and you can see the corners where the design needs to be lined up. You can also see the special die which is used for making four lace reflectors at a time.
Keeping it Clean
It’s really important that no dirt, dust or liquid gets onto the microprisms (that scratchy under-surface) because that would stop the light bouncing in the right direction. So a white backing sheet needs to be put behind which will be sealed in place.
How’s it Made?
Now for the exciting bit… making the reflector. This is done with a special kind of welding machine.
- The cutter die goes into the top of the machine.
- One microsprismatic sheet is placed (scratchy side down) on top of the backing sheet with another microprismatic sheet underneath (scratchy side up).
- The print marks are lined up.
- Then two buttons are pressed and the cutter die comes down and welds the sheets together, cutting out the shape of the reflector, several at a time.
Ready to Go!
Once the pressed sheets are cool enough, they are pressed out and a clip is attached to each reflector. And hey presto! There it is. This is how a clip-on reflector or zip clip is made!
A Few Variations of Reflector
- Badges have a plain white back and a badge pin fixed to the back – before the badges are pressed out so they are straight.
- Stick-on reflectors are made the same way but a layer of really strong glue and backing paper is added before they are welded.
- Snapbands have a spring placed inside them to give them the clever ‘snap’ and a soft piece of material for the back so it feels nice on your wrist.
- Some reflectors, such as the lace reflectors, have a padded feel; this is when a thin layer of foam is added as a layer under the backing.
Classroom Activity Ideas:
Warning! This task involves destroying a reflector which has been lovingly made … but we will forgive you in the name of science… and we hope you will forgive us for suggesting it!
- You will need at least one reflector. You can buy these online here. If you are ordering reflectors anyway from us to keep (not cut up) and also want some to cut up please let us know when ordering and we will add some free to your order for experiments.
- Cut up a reflector to see the layers that make it up. The top layer is the microprismatic sheet which is what you are really interested in. Feel the microprismatic material on both sides and notice the difference.
- Examine the microprismatic side under a microscope so you can see the shapes.
- Draw your own version of our diagram showing how the microprisms bounce light back to where it came from.
- Test the material for reflectivity by taking a photo with flash on a phone.
- Now rub some dirt on the back of the material (into the scratchy side) and take a flash photo of the front against a backing again – does it make a difference?